
Set up authentication via SAML2 with ADFS
Procedure:
-
Set the necessary start parameters in the Aeneis application directory
-
Configure SAML2 in Aeneis
-
Configure the relevant SAML settings in ADFS Management
Note: SAML2 only works with SHA-256. SHA-1 or others are not currently supported.
Note: Authentication via SAML2 only works if the link to the IDP has been added to config.yml.
Set start parameters in the application directory
Set the following start parameters in the vmoptions in the Aeneis application directory:
-
-Daeneis.hostname=
-
-Daeneis.webserver.ssl.enabled=true
-
-Daeneis.webserver.ssl.keystore.password=aeneis
-
-Daeneis.webserver.ssl.cipher.suites=TLS_RSA_WITH_AES_128_CBC_SHA,TLS_RSA_WITH_AES_256_CBC_SHA
-
-Daeneis.webserver.ssl.keystore.key-alias=[KEY-ALIAS]
Note: The -Daeneis.webserver.ssl.keystore.key-alias= start parameter sets the alias name of the key pair from the aeneis-server-keystore.jks file.
Configure SAML2 in Aeneis
To set up authentication via SAML2 in Aeneis, create and configure a new token-based authentication in the ServerAdministration.
Instruction:
-
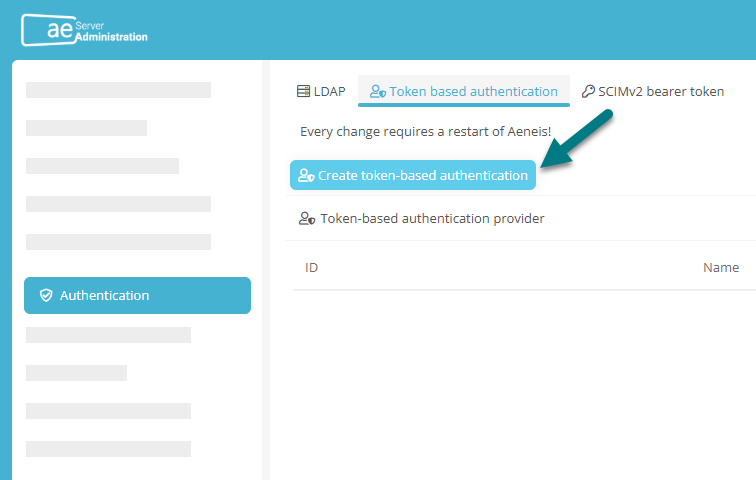
Navigate to the Authentication area in the ServerAdministration and switch to the Token-based authentication tab
-
Click on Create token-based authentication:
-
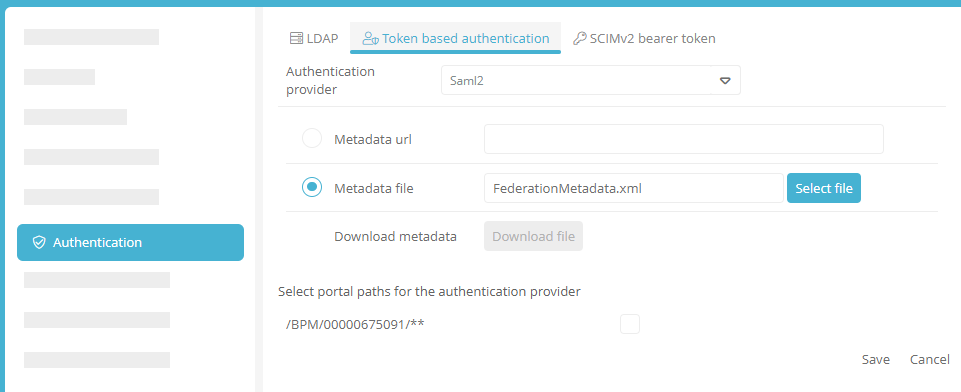
Enter the following properties in the Create token-based authentication dialog:
Property
Explanation
Authentication provider Select SAML2 here. Name The name you assign here corresponds to the subsequent display name of the corresponding button in the Portal login. Metadata file
Here you store the ADFS metadata XML.
Metadata url
Enter the following URL here: https://[ADFS_SERVER]/FederationMetadata/2007-06/FederationMetadata.xml
Note: If you have your own SSL certificate, you can optionally add the certificate under Certificates (Beta).
-
In the Create token-based authentication dialog, click Create
-
Restart the Aeneis server
-
Navigate to the Authentication section of ServerAdministration again and switch to the Token based authentication tab
-
In the Token-based authentication provider table, click Edit for Saml2 authentication:
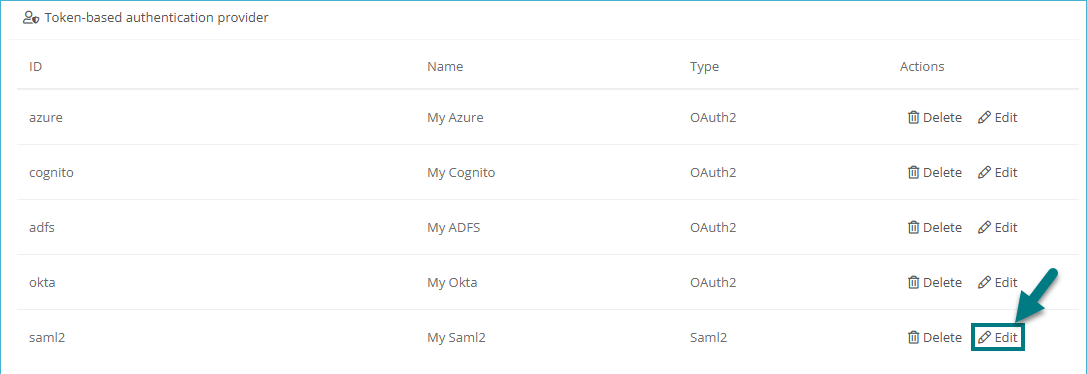
Note: You can use the Edit button to make changes to the respective authentication at any time, e.g. to adjust the name.
-
In the Edit token-based authentication dialog, click Download file
-
In the Edit token-based authentication dialog, click Edit
Note: To enable users to log in to the Portal via authentication, restart Aeneis after setup or changes.
Configure SAML settings in ADFS Management
To complete the setup of SAML authentication, configure the corresponding SAML settings in ADFS Management.
Instructions:
-
Under Control Panel | Administrative Tools, select Add Relying Party Trust.
Note: It may be necessary to install Active Directory Federation Services.
-
Select the option Import data about the relying party from a file and attach the metadata file
Note: When clicking Next, a message appears that some metadata contents are not supported. Ignore this message.
-
Enable the I do not want to configure multi-factor authentication settings for this relying party trust at this time option and click Next
-
Enable the Permit all users to access this relying party option and click Next
-
In the Ready to Add Trust entry in the Endpoint tab, check if multiple endpoint values are set. If not, check if the metadata file was generated over HTTPS
-
Activate the Open the Edit Claim Rules dialog option and finish
-
Add a new rule via Add Rule
-
Select the Send LDAP Attributes as Claims rule type and click Next
-
Enter a claim rule name
-
Select Active Directory as the attribute store
-
Create the following rules:

LDAP attribute
Outgoing claim type
Description
Email addresses
Email address
E-mail addresses is used to set the user's e-mail address if it is created during login.
Display name
Specified name
The display name is used to set the name of the user if he/she is created during login.
Token groups - unqualified names
Group
This attribute is only configured if external groups with the names from ADFS exist in Aeneis and are to be synchronized with the users. This will add or remove users from the groups when they log in, if they are also in the groups in ADFS or have been removed.
User-Principal-Name
Name ID
Must be configured! The user principal name defines which attribute is used as the ID for logging in the user(s).
-
Exit the wizard via OK
-
Add the following to the ADFS server:
Set-AdfsRelyingPartyTrust -SamlResponseSignature "MessageAndAssertion" -TargetName "Display-Name"Note: Enter the previously specified display name from step 3 as the "Display name".
Result:
Authentication in Aeneis via SAML2 is now set up. Users can log in to the Portal via authentication by clicking on the button with the configured name. The selected authentication method is saved for 30 days, so that a new selection is only necessary after this period.

Note: To enable users to log in to the Portal via authentication, restart Aeneis after setup or changes.
Add electronic signature
If you use electronic signature in Aeneis (Show login dialog in transitions property) and have set up authentication via SAML2 ADFS, add the following entry to the very end of the application.yml file in the Aeneis application directory:
urls: {adfs: '[URL of ADFS]'}