FAQs
See also: To learn how to add attributes to categories, see Schema, Categories and Attributes.
In Aeneis, if a session is not ended correctly, objects may be locked.
Locked object is automatically released after session timeout
Locked objects are automatically unlocked after the session timeout (default: 30 minutes).
Manually release individual session
To release an object, you can manually end the session of individual users in the ServerAdministration under Information | Active sessions.

See also: System information
Manually release all sessions
You can end all sessions on database level via SystemAdministration and ServerAdministration.
-
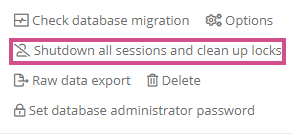
In the ServerAdministration, under Databases, click Shutdown all sessions and clean up locks:
-
In the SystemAdministration, click Delete locks on the menu bar:

Attention: The actions Shutdown all sessions and clean up locks in the ServerAdministration and Delete locks in the SystemAdministration end all active sessions. All currently logged in users will be logged out. Perform the actions only when no modelers are actively working anymore.
See also: Manage database
Release locked object on the database
You can also release a locked object with an SQL statement on the database.
Instruction:
-
Stop the Aeneis server service
-
On the server, open the MSSQL Server Manager
-
Select the database
-
Call a SQLQuery/SQL query on the database
-
Execute the following statement:
DELETE FROM AEN_PROPR WHERE AEN_ATTID='locks' -
Restart the Aeneis server service
The dates and times displayed in Aeneis are always provided by the server. Date and time information does not adjust to the time zone of the browser from which Aeneis is accessed.
Example: The Aeneis server is located in Germany. At 2:30 pm, an object is renamed in the Portal. All users will now see the time 2:30 pm in the Audit trail. Users who are in a different time zone will also see the timestamp 2:30 pm in the Portal.
If problems occur, you can export the logged actions as a zip file in Aeneis. The log files assist Aeneis support in troubleshooting.
Instruction:
-
Log in to the ServerAdministration
See also: To learn how to log in to ServerAdministration, see Open the ServerAdministration.
-
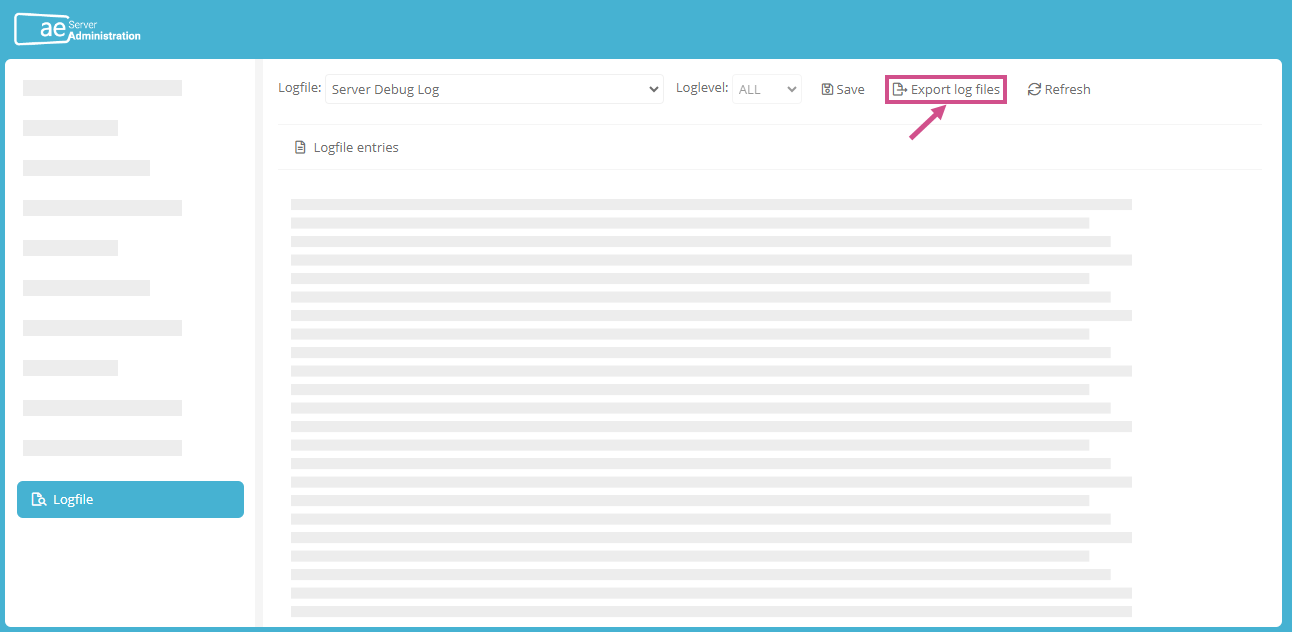
In the Logfile section, click Export log files to generate and download the log files:
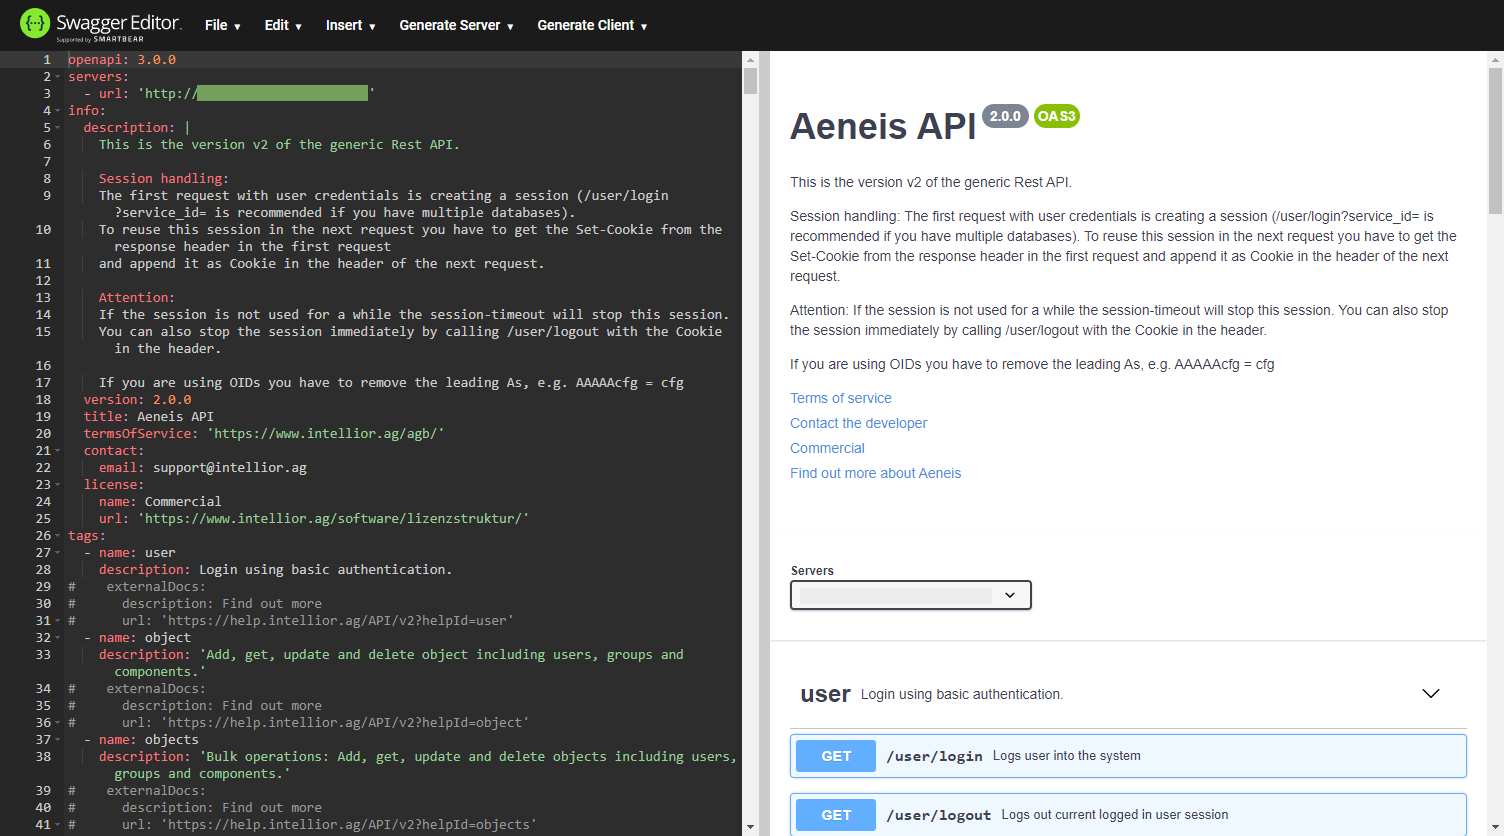
The programming interface, Aeneis REST API, is provided in OpenAPI 3.0.0 format. You can download the Aeneis REST API as a yaml file and open it directly in the browser using the Swagger Editor.
Instruction:
-
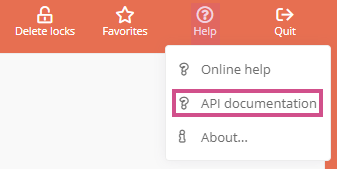
In SystemAdministration, select Help | API Documentation from the menu bar to download the REST API as a yaml file:
-
Open a new browser tab
-
Open the Swagger Editor with the following link: https://editor.swagger.io/
-
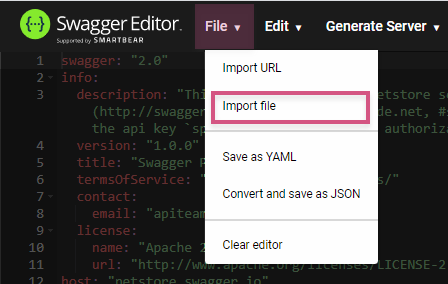
In the Swagger Editor, select File | Import file from the menu bar:
-
Open the downloaded yaml file with the Aeneis REST API to import it into the Swagger Editor
Result:
The Aeneis REST API is displayed in the Swagger Editor.
See also: You can find out how to migrate to the input/output concept under Migrate to input/output concept.
See also: To learn how to migrate to process chaining, see Migrate process linking.
See also: To learn how to enable an LDAP server SSL, see Enable LDAP Server SSL.
Databases
Instruction:
-
Open Microsoft SQL Server Management Studio
-
Select the database
-
Select Tasks | Save in the context menu to open the Save Database dialog
-
In the Backup Database dialog, under General | Target select Add to open the Select Backup Target dialog
-
In the Select backup destination dialog, specify where the database backup should be stored
-
Confirm in the Select backup destination and Backup database dialogs with OK
Instruction:
-
Open Microsoft SQL Server Management Studio
-
Select the database
-
Select Restore database... from the context menu
-
In the Restore Database dialog, select the Medium option under General | Source and store the database backup file (.bak) to be restored
-
For the name under General | Target in the Database property, note the following:
-
Do not change the name if the current database is to be overwritten with the database backup
-
Specify a new name if a new database is to be created with the database backup
-
-
Rename the files (.mdf and .log.ldf) under Files in the table in the Restore column as the files
-
Confirm with OK
Note: The user or login of the restored database will also be imported. This can lead to problems, since a default database must be selected per user.
Solution: In the login (users), remove the new database and create a new user for the new database.
Installation & Update
Instruction:
-
Create a database backup (SQL dump or raw data export)
-
Download the file aeneis_server_windows-x64_6_0_19.exe
-
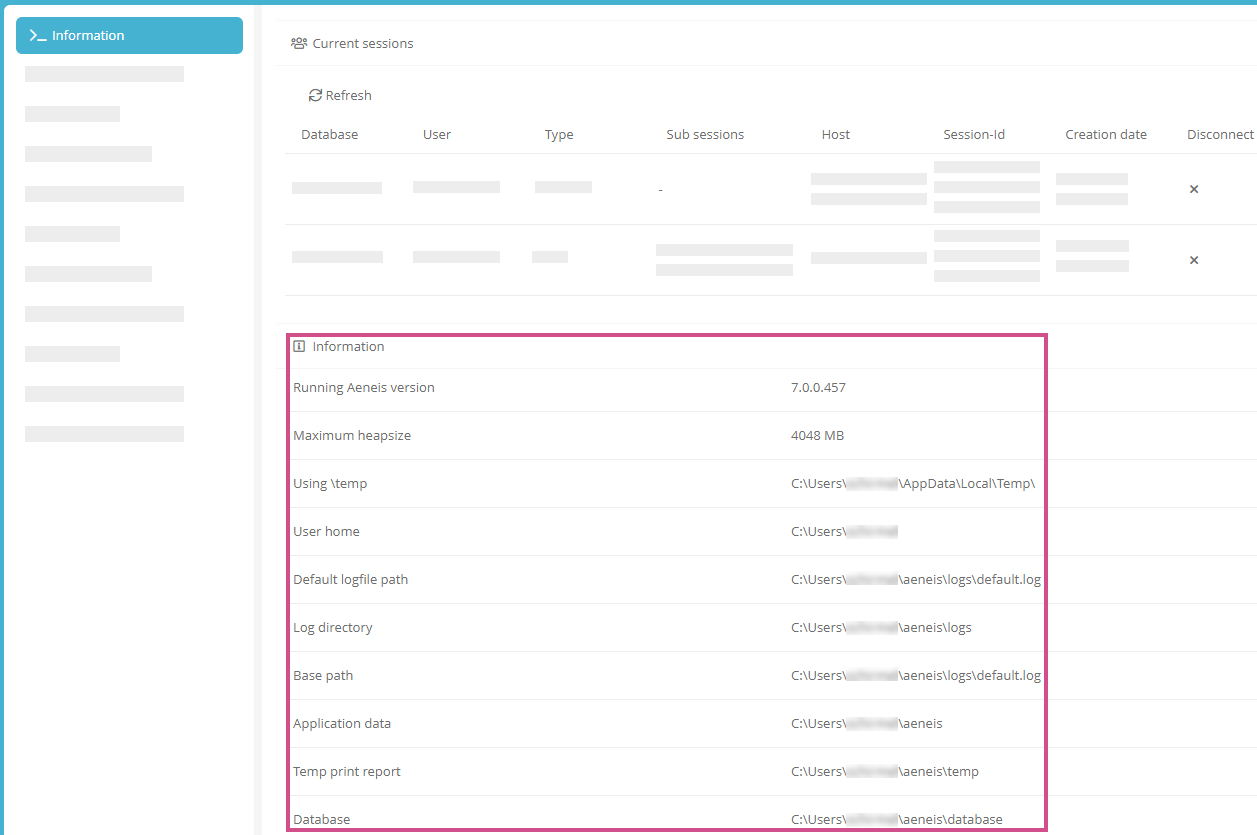
Open the ServerAdministration and check under Information | Information where the Aeneis server is installed:
-
In the ServerAdministration, under Active Sessions, make sure that no modelers are logged in and no unsaved states exist
-
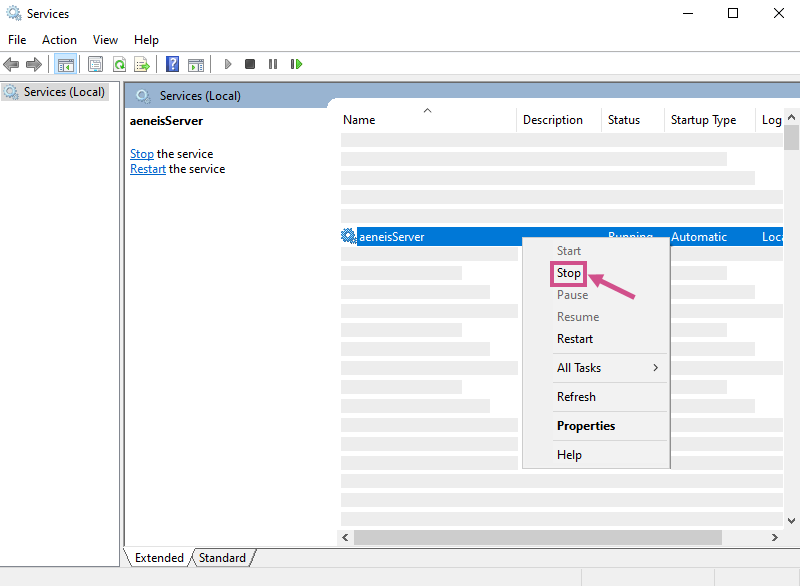
Pause or stop the Aeneis server service:
-
Run the file aeneis_server_windows-x64_6_0_19.exe
-
In the installation wizard, select the Custom option and the corresponding directories
-
Installation directory: directory where the lib, report and openoffice directories are located.
-
Application directory/user directory: directory where the directories database, oo, temp... are located.
-
-
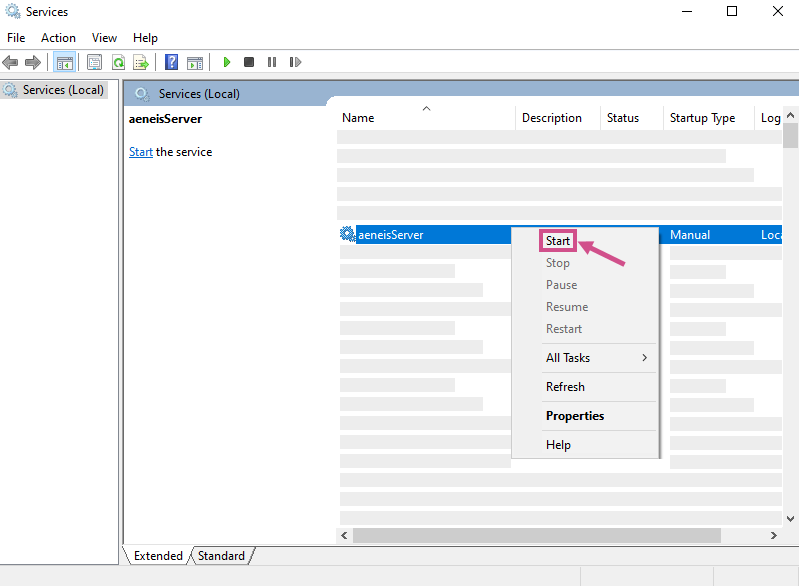
After the installation, the service should start again automatically. In ServerAdministration, start the service manually under Services if it was not started automatically:
-
In ServerAdministration, under Databases, select the database and choose Check database migration.
Instruction:
-
Download the file aeneis_client_windows-x64_6_0_19.exe
-
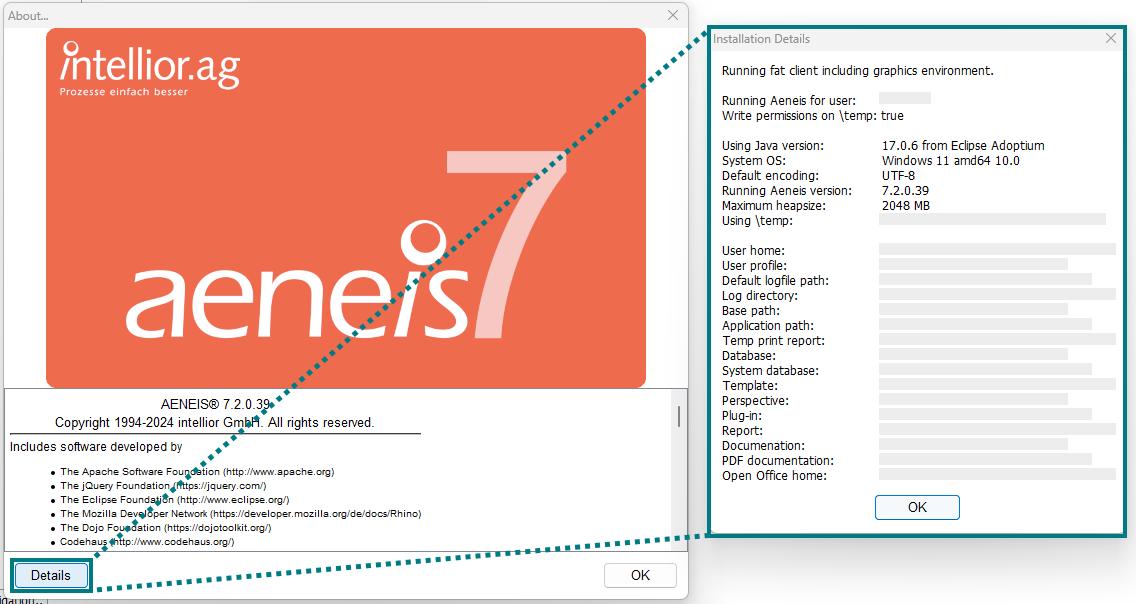
Open the Aeneis client and check where the client is installed using Help | About | Details:
-
Exit the Aeneis client
-
Run the file aeneis_client_windows-x64_6_0_19.exe
-
In the installation wizard, select the Custom option and the appropriate directories:
-
Installation directory: directory where the lib, report and openoffice directories are located.
-
Application directory/user directory: directory where the directories database, oo, temp... are located.
-
-
After the successful installation, restart the Aeneis client

