AI modeling with SmartModel
In addition to the manual mode, you can use SmartModel to have the basic structure of a process sketched out by an AI. As soon as you have started AI modeling in the Portal and provided the AI with the necessary background information, the AI automatically fills the SmartModel table with data. Using the SmartModel table, Aeneis then automatically draws the BPMN diagram for the AI-generated process.
Functional scope of AI modeling
AI modeling with SmartModel offers you the following range of functions:
-
AI-generated process creation with events, branches, tasks and sub-processes
-
Optional assignment of tasks and sub-processes to AI-generated roles in the Responsibility attribute
-
Optional submission of additional background information to the AI via a text field and file uploads, such as process descriptions
-
Optional AI-generated descriptions for each AI-generated child object
-
Optional machine translation of AI-generated objects and descriptions
-
Optional inclusion of individual suggestions for improving AI output
-
By providing the AI with specific background information about your company, it tries to tailor processes to your company profile.
Voraussetzung: You have a valid license installed.
Hinweis: You can view your current usage and your monthly AI credit limit in the AI usage section via the Help section in the Portal header. If you need an upgrade for more AI requests, please contact your Aeneis consultant.
Hinweis: The Aeneis AI functions are based on an OpenAI language model that has been enriched with Aeneis-specific knowledge, best practices from the areas of Business Process Management and Governance, Risk & Compliance as well as publicly available data. This ensures precise and context-related answers and suggestions provided by the AI.
Hinweis: AI modeling was specially developed to give you an initial idea of new processes. Please note that the AI can make mistakes here. Therefore, always review all AI-generated results carefully and correct them if necessary.
Hinweis: We send only the process name and the additional context that you actively provide for modeling to the AI. If the process is in a scope for which the properties legal form, industry, country or number of employees are assigned, these are also transferred. The data is only used to generate processes. They are not saved or used to train the AI.
Tipp: If required, you can configure a privacy policy via the properties of the Portal report, which contains data protection information on the use of AI services from Aeneis. All users must then agree to this privacy policy as soon as they log in to the portal.
Start AI modeling
In the Portal, you can launch AI modeling from several different sections:
-
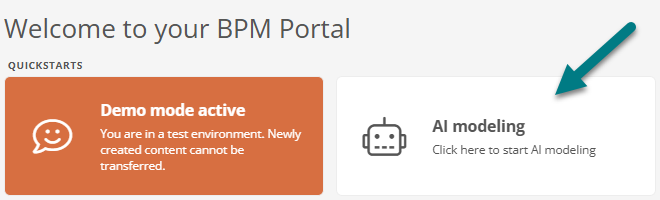
Start AI modeling from the Portal's homepage using the quickstart: AI modeling option.
-
Start AI modeling on a process without a diagram.
-
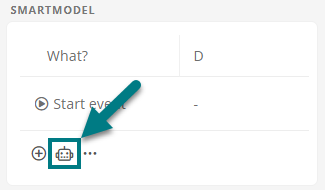
Start the AI modeling on a process in which only the start event is created in the SmartModel table.
Hinweis: Make sure that the correct legal entity is stored in the Valid for property so that your company profile is included in the AI modeling.
Start AI modeling via homepage
You can start AI modeling using the AI modeling quickstart.
Instructions:
-
Navigate to the Portal Homepage
-
Click on the quickstart AI modeling:
-
Fill in the form in the Start AI modeling dialog
Siehe auch: Start AI modeling dialog
-
Confirm in the dialog with Start
Once you have accepted the process suggested by the AI, the results are as follows:
-
You will be automatically redirected to the new process in the SmartModel view.
-
Based on the process name, your description, and the uploaded reference files, the AI has populated the SmartModel table with events, branches, tasks, and subprocesses.
-
If the AI should take it into account, it has entered the roles involved in the responsible column of the SmartModel table.
-
If the AI should take it into account, it has filled the Description attribute for every child object it has created.
-
If the AI should take it into account, it has translated the names of the new objects and their descriptions into your model languages.
-
The BPMN diagram for your process was automatically drawn in accordance with the AI-generated objects and attribute values.
-
The Keep, improve, or delete AI-generated process dialog appears, allowing you to delete the new process if necessary or revise it using AI.
-
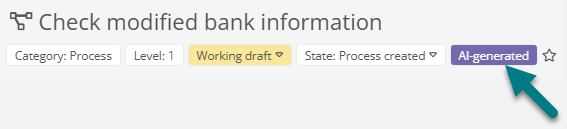
The purple chip in the header of the process and its children indicates to all readers that these objects are AI-generated.
-
Administrators can see in the AI provenance property in the System information that the process was generated by AI.
-
The additional context you provided will be included in the process property AI modeling prompt.
Start AI modeling in process without diagram
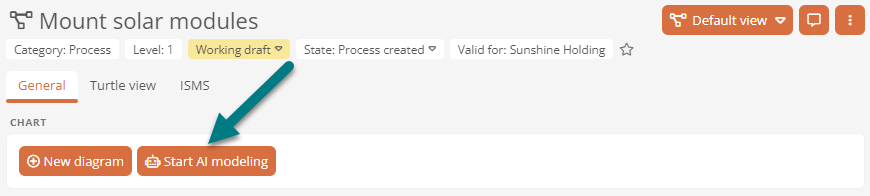
For processes that have already been created but do not yet have a diagram, you can initiate AI modeling from the object's Default view using theStart AI Modeling field. Depending on how you interact with the field, the Start AI modeling dialog will either automatically attach the desired file or start voice input.
Instructions:
-
Navigate to the Default view of a process that does not yet have a diagram
-
Start AI modeling by interacting with the Start AI modeling field. Here you have the following options:
-
Drag a file in one of the supported formats into the field to provide the AI with a file as background information
-
Click Select file and choose a file from the directory to provide the AI with background information.
-
Click Start without a file if you do not want to provide a file to the AI
-
Click Dictate to immediately begin voice input in the AI Modeling dialog box
Hinweis: The first time you use speech recognition during your session, a dialog box will ask whether you want to use it locally or via an online service.
-
-
Enter additional background information in the Start AI modeling dialog
Siehe auch: Start AI modeling dialog
Siehe auch: The results are described under Start AI modeling via homepage.
Start AI modeling in process with start event
In processes that have already been created and in which only the start event is displayed in the diagram, AI modeling can be started subsequently by clicking on  in the table in the SmartModel view.
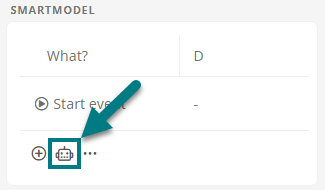
This will open the Start AI modeling dialog, where you can enter the background information that the AI should take into account during process modeling.
Achtung: Main assigned start events in the SmartModel table are deleted by the AI modeling.
Start AI modeling dialog
If you have initiated AI modeling using the corresponding quickstart or the process, the Start AI modeling dialog opens, where you can provide the AI with context information for process modeling. As soon as you click Start in the dialog box, the process is automatically created with a BPMN diagram and a populated SmartModel table.
Name: When you create an AI model using the quickstart on the homepage, you can enter a name for the process.
Hinweis: This field is available only if you create the process using the AI modeling quickstart on the portal homepage.
Additional context: Describe the process or provide additional information that the AI should take into account. Here are the following input options:
-
Type in some text
-
Use voice input
Siehe auch: Use voice input
Select files: Select one or more files in the supported formats.
Hinweis: You can upload files of up to 512 MB in total. Accepted file formats are PDF, DOCX, TXT, MD, HTML, PPTX, PNG, JPG, JPEG, and GIF.
Select additional AI-generated content: Use the checkboxes to specify which additional content you want the AI to generate for you:
| Option | Description |
|---|---|
| Generate descriptions | The AI generates a Description for each of the events, branches, tasks and sub-processes that it creates. |
| Translate labels and descriptions | The AI translates the names of the events, branches, tasks, sub-processes and descriptions that it creates into your model languages. |
| Generate roles |
The AI creates new roles and fills the Responsible column in the SmartModel table. Hinweis: So that you can easily recognize AI-generated roles, they end up in the AI-generated roles master data folder after creation. This subfolder is located in the role folder of your master data. |
Storage location: Specify where the new process will be stored within the project area.
Tipp: You can change the storage location in the schema under the Process category using the Storage location attribute. To do this, enter the GUID of the desired storage location in the Default value attribute. Enter the GUID 92cae951-d2d1-4003-9198-35d70a1008a3 there, for example, to reference the Processes folder as the storage location.
Hinweis: The Storage location field is available only if you create the process using the AI modeling quickstart on the Portal homepage.
Dialog Keep, Improve, or Delete AI Process
Once you have started the AI modeling process using the corresponding dialog box, you will be redirected to the SmartModel view. There you will see the new BPMN diagram and the SmartModel table, which has been automatically populated. At the same time, the Keep, improve, or delete AI Process dialog box opens, allowing you to improve or delete the new process.
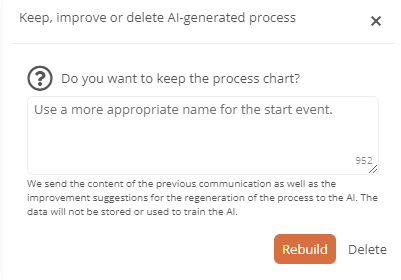
Instructions:
-
Leave the dialog Keep, improve or delete AI-generated process open
-
Review the results of the AI-modeled process
-
In the Keep, improve, or delete AI-generated process dialog box, enter a suggestion for improvement in the text field if you want the AI to revise the process again: Here are the following input options:
-
Type in some text
-
Use voice input
Siehe auch: Use voice input
Beispiel: For example, enter "Use a meaningful start event" as a suggestion for the AI.
-
-
Click the appropriate buttons to close the dialog box:
-
Click on Keep if you do not have a suggestion for improvement
Hinweis: This button is only available if you haven't entered a suggestion for improvement in the text box.
-
Click Improve to have the AI revise the process based on your suggestion
Hinweis: This button is only available if you have entered a suggestion for improvement in the text field.
-
Click Delete to delete the AI-generated objects and attribute values
Results:
-
Once you click Improve, the AI will revise the process, and the Keep, improve, or delete AI-generated process dialog box will appear again.
-
If you have submitted a suggestion for improvement, it will be included in the process property AI modeling prompt.
-
If you did not enter a suggestion for improvement and clicked Keep, the previous result will be applied and the dialog box will no longer appear.
-
Use voice input
When you start AI modeling or improve the AI-generated process, you can also provide the description using voice input instead of typing. To do this, use voice input in the corresponding text field of the respective dialog box.
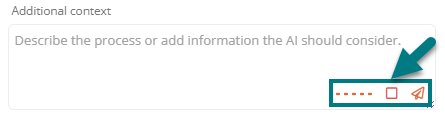
Use online speech recognition
If you prefer to use online speech recognition instead of local speech recognition, you can optionally enable the corresponding toggle button and confirm your selection by clicking the appropriate button in the dialog box that appears.

Voraussetzung: The button is only available if the Allow online speech recognition option is enabled in the database properties.
Hinweis: If you enable this option, your recording will be sent to your browser's online service (e.g., Chrome, Edge, or Safari) and processed outside of Aeneis. This may involve the transfer of data to countries outside the EU. Online speech recognition is automatically disabled again at the end of the session. During the session, you can switch back to local speech recognition at any time using the toggle switch in the Start AI modeling dialog. In local mode, no data is transmitted outside of Aeneis.
Start recording
Once you have started a recording, you can either keep it or discard it and restart.
-
To start recording, click
 in the Additional context field.
Hinweis: The first time you use speech recognition during your session, a dialog box will ask whether you want to use it locally or via an online service.
Hinweis: If you start AI modeling from the default view of the process (without a diagram) by clicking
 , recording begins automatically.
Hinweis: Voice input will only work if you have previously granted the necessary access to your device.
-
Click
 to upload the recording and convert it to text.
Hinweis: After 1.5 seconds of silence, the recording will automatically stop and be converted to text.
-
Click
 if you do not want discard the recording.
AI modeling history
All prompts and files provided to the AI during process creation or improvement are documented in the process properties. This will help you understand how the current AI-generated process came about.
All prompts submitted via AI-generated process creation or improvement are documented, along with a timestamp, in the AI modeling prompt process property. Improvement suggestions are marked with Correction.
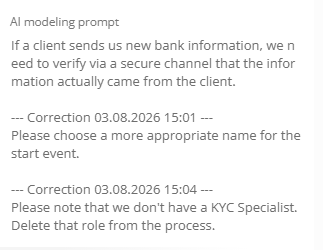
Uploaded files
The files uploaded during AI-generated process creation are stored in the Files property of the relevant process.
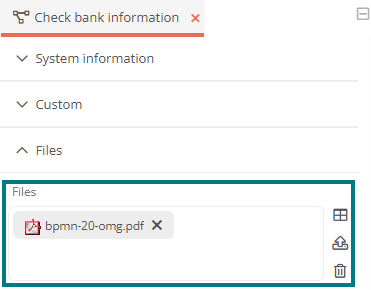
Hinweis: By default, this property is visible only in the SystemAdministration.
Integrate company profile into AI modeling
The AI takes background information about your company into account in order to tailor AI-modeled processes to your needs. In Aeneis you provide the AI with your company information via Legal entities. To do this, fill in the following attributes in the AI properties group of the respective Legal entity:
| Attribute | Description |
|---|---|
| Industry | Enter an object in the Industry category here so that the AI takes into account the industry in which you work. |
| Country | Enter an object in the Country category here so that the AI takes regional factors into account. |
| Number of employees | Enter an integer here so that the AI takes your company size into account. |
| Legal form | Enter a sorted instance of the Legal form category here so that the AI takes into account factors associated with the legal form of your company. |
Hinweis: Make sure that the legal entity whose company information is to be taken into account is stored in the Valid for property in the process before you start AI modeling.