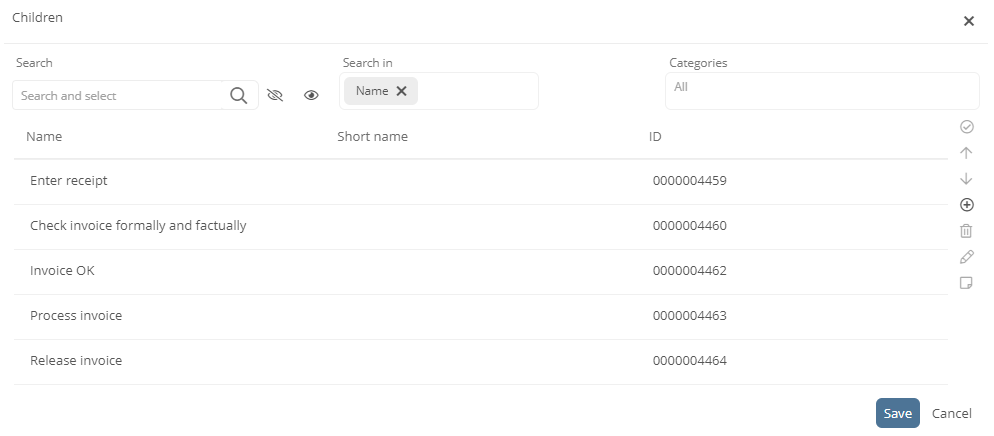
Extended reference editor
You can use the extended reference editor to clearly define and manage child objects and references.
Note: The extended reference editor is available in the Portal, in the WebModeller, in the SystemAdministration and in the UserAdministration.
See also: Further details on references and how to add references quickly are described under References.
Open reference editor
Depending on the Aeneis app, you can open the extended reference editor in different ways:
-
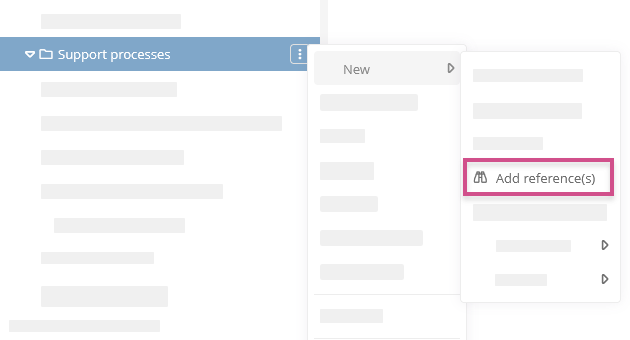
In WebModeller and SystemAdministration, select the object in the tree and select the Add reference(s) entry in the context menu:
Note: The menu entry is only available if the option References allowed is activated in the respective attribute.
Note: If you open the extended reference editor in this way, you can only create, sort and remove new references. You cannot create new objects via this menu entry. Children or references that have already been created are not displayed in this table.
-
In the WebModeller, in the SystemAdministration and in the UserAdministration, open the extended reference editor using the pencil icon next to a box:

-
In the Portal, open the SmartEdit menu in a SmartEdit field by clicking on
 and select the entry Add Reference(s):
Note: The menu entry is only available if the option References allowed is activated in the respective attribute.
-
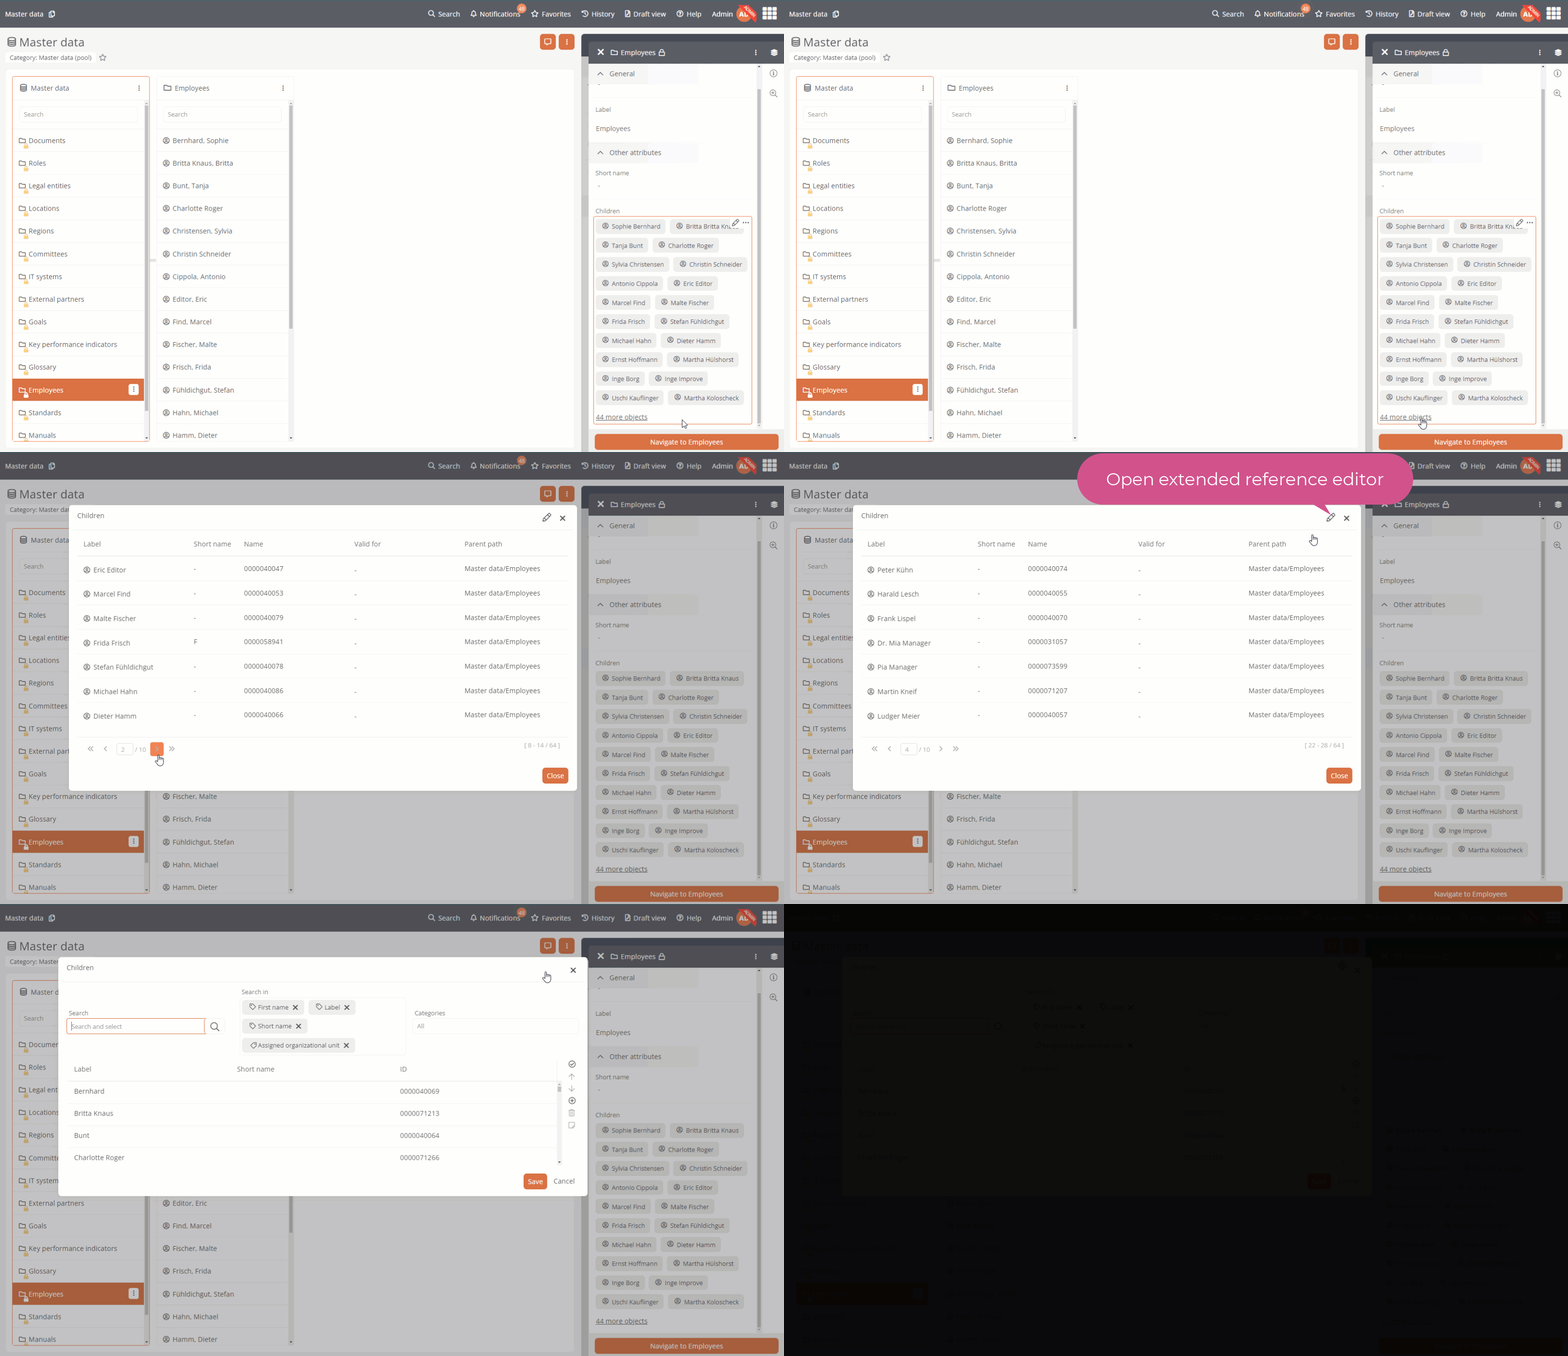
If you have write access to the object and click in the Portal in a SmartEdit field in which more objects are stored than in the database property Quick reference max. number of results to display the extended reference editor opens, in which you can edit all stored objects. You will also be notified that the permitted number of search results has been exceeded:

-
In an attribute in which more than 20 objects are stored, the x more objects button is available in the sidebar of the Portal. Click on the button to open a list in which all objects stored in the attribute are listed. If you have write access, you can click on the pencil to open the extended reference editor and edit the attribute values:
Add references
By setting parameters in the extended reference editor, you restrict the search for suitable objects as a reference. You can use the search bar in the reference editor to search for objects that already exist and add them as a reference. You can use search parameters to identify the object to be referenced.

Note: References can only be added in the extended reference editor if the option References allowed is activated in the respective attribute.
Instructions - Determine referenced object
-
In the Category field, select a permitted category that Aeneis should restrict itself to when searching for the referenced object:

-
In the Search in field, select the permitted attributes that are to be included in your search:

Example: If you reference ID here, Aeneis will find the desired object during the search if you enter the corresponding ID in the search field. If ID is not referenced in Search in and you enter an ID in the search field, Aeneis will not find the desired object via the ID attribute.
-
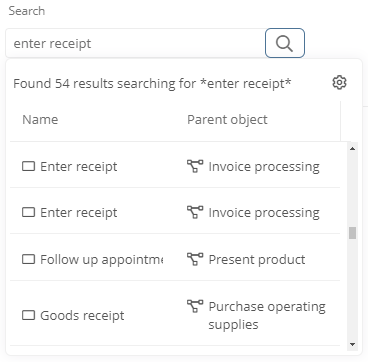
Enter your search term in the Search and select field:
-
If required, restrict your search to specific scopes by clicking on

See also: Scopes in the WebModeller
-
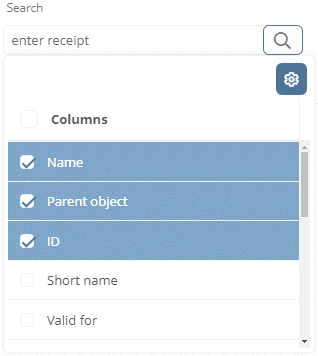
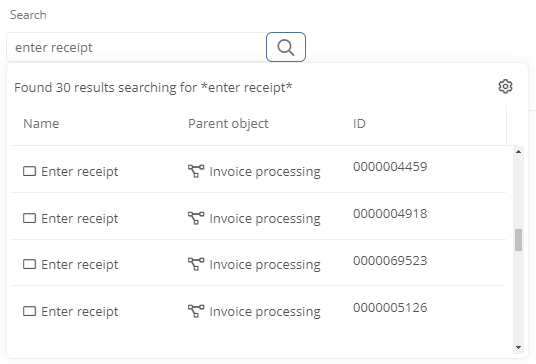
Click on the gear icon in the search results to see further identification attributes of the object
-
Select further attributes to be displayed in addition to the identification during the search:
-
Click on the gear icon again to accept the new view of search results:
-
Select the appropriate object from the search results and transfer it to the object list by clicking on it
Create objects
You can create objects of a permitted category via the sidebar of the extended reference editor:
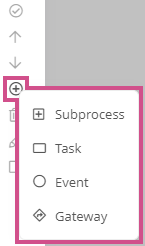
Note: Objects can only be created in the reference editor if the option New objects allowed is activated in the respective attribute.
As soon as you have selected a permitted category, the properties of the new object appear, where you can assign a name, for example. Click on Save in the properties dialog to add the object to the list as a main assigned child object.
Apply to child objects
If you create or change a scope or an ACL of an object manually, the scope of the child objects remains unchanged. If you want to adjust the scope of the child objects automatically and specifically to the parent object, use the Apply to child objects function in the right-hand sidebar in the Valid for, Invalid for or ACL attributes:
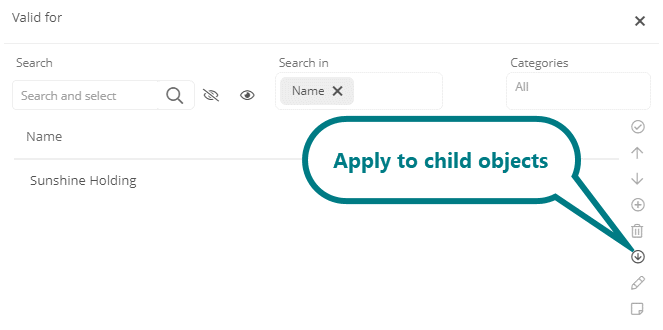
See also: The function is described under Apply scopes to child objects using the example of the Valid for attribute.
View and edit properties
You can view and edit the properties of the object you have selected in the table using the right-hand sidebar. If the object has relationship properties, you can also view and edit these:
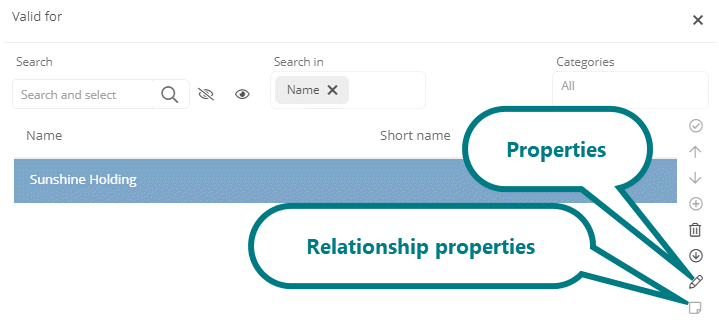
Remove object
You can remove references and main objects from the attribute using the right-hand sidebar:

Attention: If you remove main objects that are not referenced anywhere else in the database, the object is deleted completely.
See also: Delete model objects
Sort objects
To sort objects in the extended reference table, select one or more model objects in the table and move them using the arrow buttons in the sidebar:
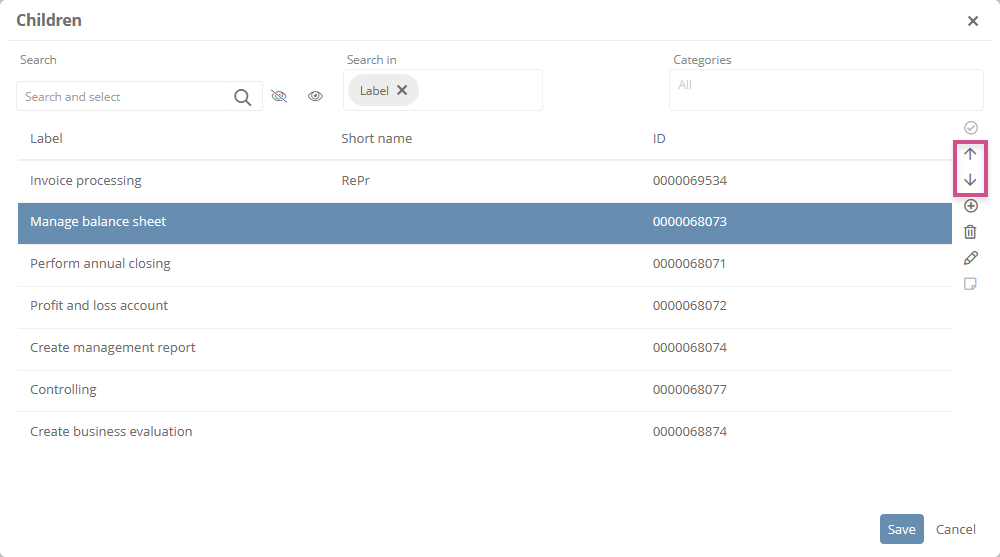
Note: Inverse attributes are not taken into account when sorting.
Note: In BPMN diagrams, the sorting of shapes is automatically applied to the model overview if the Sort model overview on save property is set in the schema in the BPMN diagram profile.
Attention: If the model object that is being moved has child objects, these are also moved.
When moving process objects to another process level, the process levels of the object and the children are adjusted accordingly. When the object is moved to the lowest process level, the child objects are deleted.
See also: Move / sort model objects
Ascending and descending sorting:
In the extended reference table, you can sort the objects in ascending and descending order by clicking on the column header.
Save sorting:
Use the Save sorting button to save the current sorting:

Add and remove table columns
In the extended reference editor, you can set which columns are displayed in the table. To do this, click on  in the column header and select the columns to be displayed:
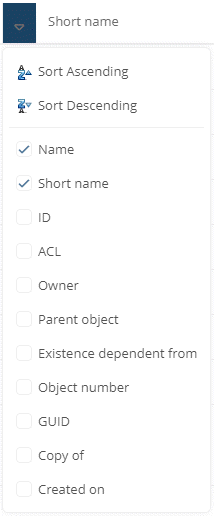
Note: You can also use the selection to sort the object list in ascending and descending order via the respective table column.

