Set up substitution
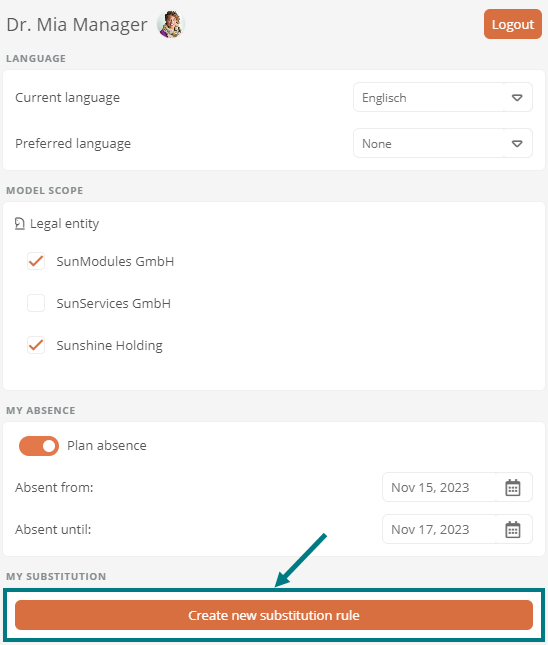
If you are absent or a colleague is allowed to take over your workflow transitions permanently, you can create a substitution rule via the user settings under My substitution. There you decide who substitutes you and to what extent.
Note: You can only create and edit a single substitution rule. You can only create a new substitution rule once the previous substitution rule has been deleted.
Instructions:
-
Open the user settings in the Portal header
See also: User settings
-
Under My substitution, click on Create new substitution rule:

-
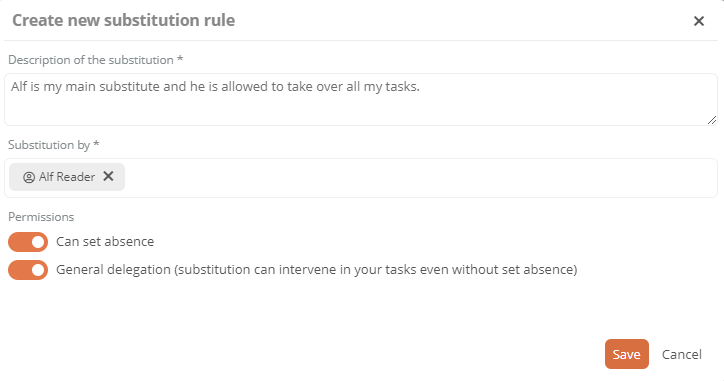
Define the substitution rule in the Create new substitution rule dialog:

Property
Description
Description of the substitution
You can enter a description of the substitution here.
Substitution by
Assign your substitute here.
Note: You can only assign a single substitute.
Note: By default, you can select an employee here.
Can set absence
-
Switch to Yes: Your substitute may also set you to absent.
Example: If you are ill and therefore unable to set your absence yourself, your substitute may change your attendance status.
See also: Set absence as substitute
-
Switch to No: Only you or an administrator can set your absence.
General delegation
-
Switch to Yes: Your substitute may also execute workflow transitions for you when you are present.
-
Switch to No: Your substitute may only execute workflow transitions for you if you are absent.
-
-
Click Save
Results:
-
According to the substitution rule, your substitute may execute workflow transitions for which you have been assigned.
-
Other users can see who the employee's substitute is in the employee's object format.
-
The substitute receives an email informing him/her of the substitution.
-
After logging in, a message appears at the bottom right of the substitute's Portal informing him/her of the substitution:

-
The substitute sees the workflow transitions that he/she is allowed to execute as a substitute in the My tasks dashboard.
-
The substitute can see details of his/her substitution in his/her user settings under I represent:

-
You can see details of your substitution rule in the user settings under My substitution:

