Configure states
Instruction:
-
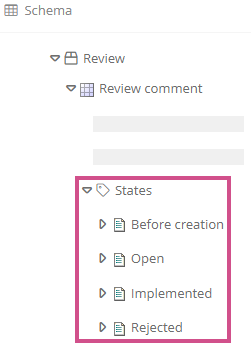
Unfold the States attribute under the corresponding category:

-
Create a new state under the State attribute or select an existing state
-
To configure the state, open the properties of the state:
Relevant properties
Description
Label
Here you can see and change the name of the state.
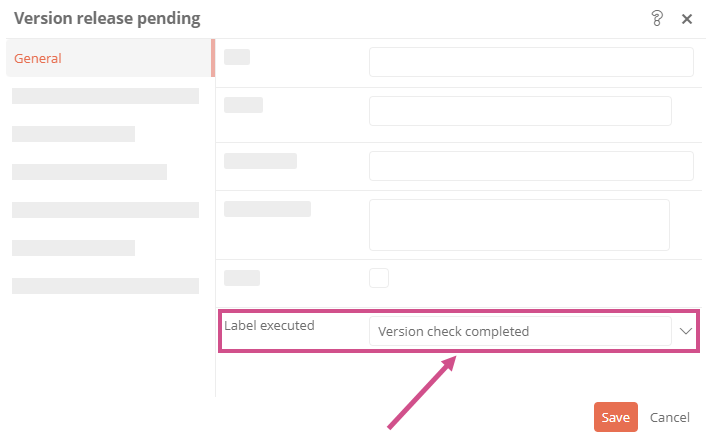
Label executed Here you enter an alternative name for the previous state in the workflow. In the history drawer in the Portal, the name of the state is replaced by the alternative name in a version card as soon as the state has been passed through.
See also: For more information about the history drawer, see Version history.
Form layout
In the Form layout attribute, you can view, reference, and create layouts for the detail view.
See also: Form layouts
Start transition behavior
This attribute controls whether the start transition is offered when an object is created via buttons, context menus or SmartEdit tables.
-
Always use when creating new object: Only the start transition is offered when creating new. The default creation is not displayed.
-
Ignore when creating a new object: The start transition is not offered on new creation. Only the default creation is displayed.
-
Display additionally when creating a new object: The start transition is offered in addition to the default creation.
Foreign workflow transitions Here you can reference the start transition of another workflow in order to switch from the current status to another workflow.
See also: Foreign workflow transitions
Relationship states You can use this property to extend the execution authorizations of the transitions that can be executed within the state. During the execution authorization of a transition, the execution authorizations of the states that are referenced here as a relationship state are also checked.
Requirements: The Check view authorization on all workflow statuses property must be disabled so that relationship statuses are checked.
To notify Here you can use attributes and queries to specifically determine which users are notified via the Portal header as soon as the status is reached in the workflow. This notification type is marked with purple in the Portal header:

Tip: This allows you to configure individual notifications that go beyond the defaults. Further details can be found under Notifications.
Transition
Here you can see, reference and create the transitions of the state.
See also: Create transitions
Start
Each workflow must have a start state. If you enable this property, you define the state as the start state.
Note: Always define the first state in the workflow as the start state.
Note: If several states are defined as start states in a workflow, the system only considers the first start state.
Emails
In the Emails property, you can create or reference escalation or reminder emails. These are sent depending on the email job.
See also: Workflow-related email notifications
Visible attributes
Here you can see, reference and create the Visible attributes that are displayed in the detail view.
See also: Visible attributes
State
Here you can see and reference the schema state associated with the state.
Color Here you can set the color in which status chips are colored in the Portal when they report the status.

-

